构建全栈 DevJokes 应用
本教程将指导你用 TanStack Start 构建一个完整的全栈应用。你将创建一个 DevJokes 应用,用户可以查看和添加开发者主题的段子,从中学习 TanStack Start 的关键概念,包括服务器函数、基于文件的数据存储和 React 组件。
下面是应用运行效果演示:
本教程的完整代码见 GitHub。
你将学到
- 搭建一个 TanStack Start 项目
- 实现服务器函数
- 读写文件数据
- 用 React 组件构建完整 UI
- 用 TanStack Router 做数据获取和导航
前置条件
- React 和 TypeScript 的基础知识。
- 你的机器上安装了 Node.js 和
pnpm
最好先了解
搭建 TanStack Start 项目
首先,创建一个新的 TanStack Start 项目:
pnpx @tanstack/cli@latest create devjokes
cd devjokes
脚本运行时,会问你几个设置问题。你可以选择适合你的选项,也可以直接按回车接受默认值。
想加更多功能,可以传 --add-on 标志,还能选择 Shadcn、Clerk、Convex、TanStack Query 等选项。
设置完成后,安装依赖并启动开发服务器:
pnpm i
pnpm dev
本项目需要 uuid 包:
# Install uuid for generating unique IDs
pnpm add uuid
理解项目结构
此时,项目结构应该看起来像这样:
/devjokes
├── src/
│   ├── routes/
│   │   ├── demo/                         # Demo routes
│   │   ├── __root.tsx                    # Root layout
│   │   └── index.tsx                     # Home page
│   ├── components/                       # React components
│   ├── data/                             # Data files
│   ├── router.tsx                        # Router configuration
│   ├── routeTree.gen.ts                  # Generated route tree
│   └── styles.css                        # Global styles
├── public/                               # Static assets
├── vite.config.ts or rsbuild.config.ts   # TanStack Start configuration
├── package.json                          # Project dependencies
└── tsconfig.json                         # TypeScript configuration
这个结构一开始可能让人眼花缭乱,但你需要关注的关键文件只有这些:
src/router.tsx——为你的应用设置路由src/routes/__root.tsx——根布局组件,你可以在其中添加全局样式和组件src/routes/index.tsx——你的首页
项目设置好后,你可以在 localhost:3000 访问你的应用。你应该会看到默认的 TanStack Start 欢迎页。
此时,你的应用会是这样:

第 1 步:从文件读取数据
我们先为段子创建一个基于文件(file-based)的存储系统。
第 1.1 步:创建一个带段子的 JSON 文件
让我们准备一组可以在页面上渲染的段子。在 src/data 中创建一个 jokes.json 文件:
touch src/data/jokes.json现在,向这个文件添加一些示例段子:
[
  {
    "id": "1",
    "question": "Why don't keyboards sleep?",
    "answer": "Because they have two shifts"
  },
  {
    "id": "2",
    "question": "Are you a RESTful API?",
    "answer": "Because you GET my attention, PUT some love, POST the cutest smile, and DELETE my bad day"
  },
  {
    "id": "3",
    "question": "I used to know a joke about Java",
    "answer": "But I ran out of memory."
  },
  {
    "id": "4",
    "question": "Why do Front-End Developers eat lunch alone?",
    "answer": "Because, they don't know how to join tables."
  },
  {
    "id": "5",
    "question": "I am declaring a war.",
    "answer": "var war;"
  }
]
第 1.2 步:为数据创建类型
让我们创建一个文件来定义数据类型。在 src/types/index.ts 新建一个文件:
// src/types/index.ts
export interface Joke {
  id: string
  question: string
  answer: string
}

export type JokesData = Joke[]
第 1.3 步:创建读取文件的服务器函数
新建 src/serverActions/jokesActions.ts,写一个服务器函数来读写文件。这里我们用 createServerFn 来创建它。
译者注:服务器函数是什么?
服务器函数是运行在服务器上、但可以直接从客户端调用的函数,本质是一种 RPC(远程过程调用)。用 createServerFn 创建后,客户端调用它就会发起一次网络请求到服务器。
// src/serverActions/jokesActions.ts
import { createServerFn } from '@tanstack/react-start'
import * as fs from 'node:fs'
import type { JokesData } from '../types'

const JOKES_FILE = 'src/data/jokes.json'

export const getJokes = createServerFn({ method: 'GET' }).handler(async () => {
  const jokes = await fs.promises.readFile(JOKES_FILE, 'utf-8')
  return JSON.parse(jokes) as JokesData
})
在这段代码中,我们用 createServerFn 创建了一个服务器函数,从 JSON 文件中读取段子。在 handler 函数里,我们用 fs 模块读取文件。
译者注:node:fs 是什么?
node:fs 是 Node.js 自带的文件系统模块,fs.promises.readFile 用于读取文件内容,第 2 步还会用到 writeFile 来写入文件。
第 1.4 步:在客户端使用服务器函数
要使用这个服务器函数,我们可以在代码中直接调用它——用随 TanStack Start 一起安装的 TanStack Router 即可!
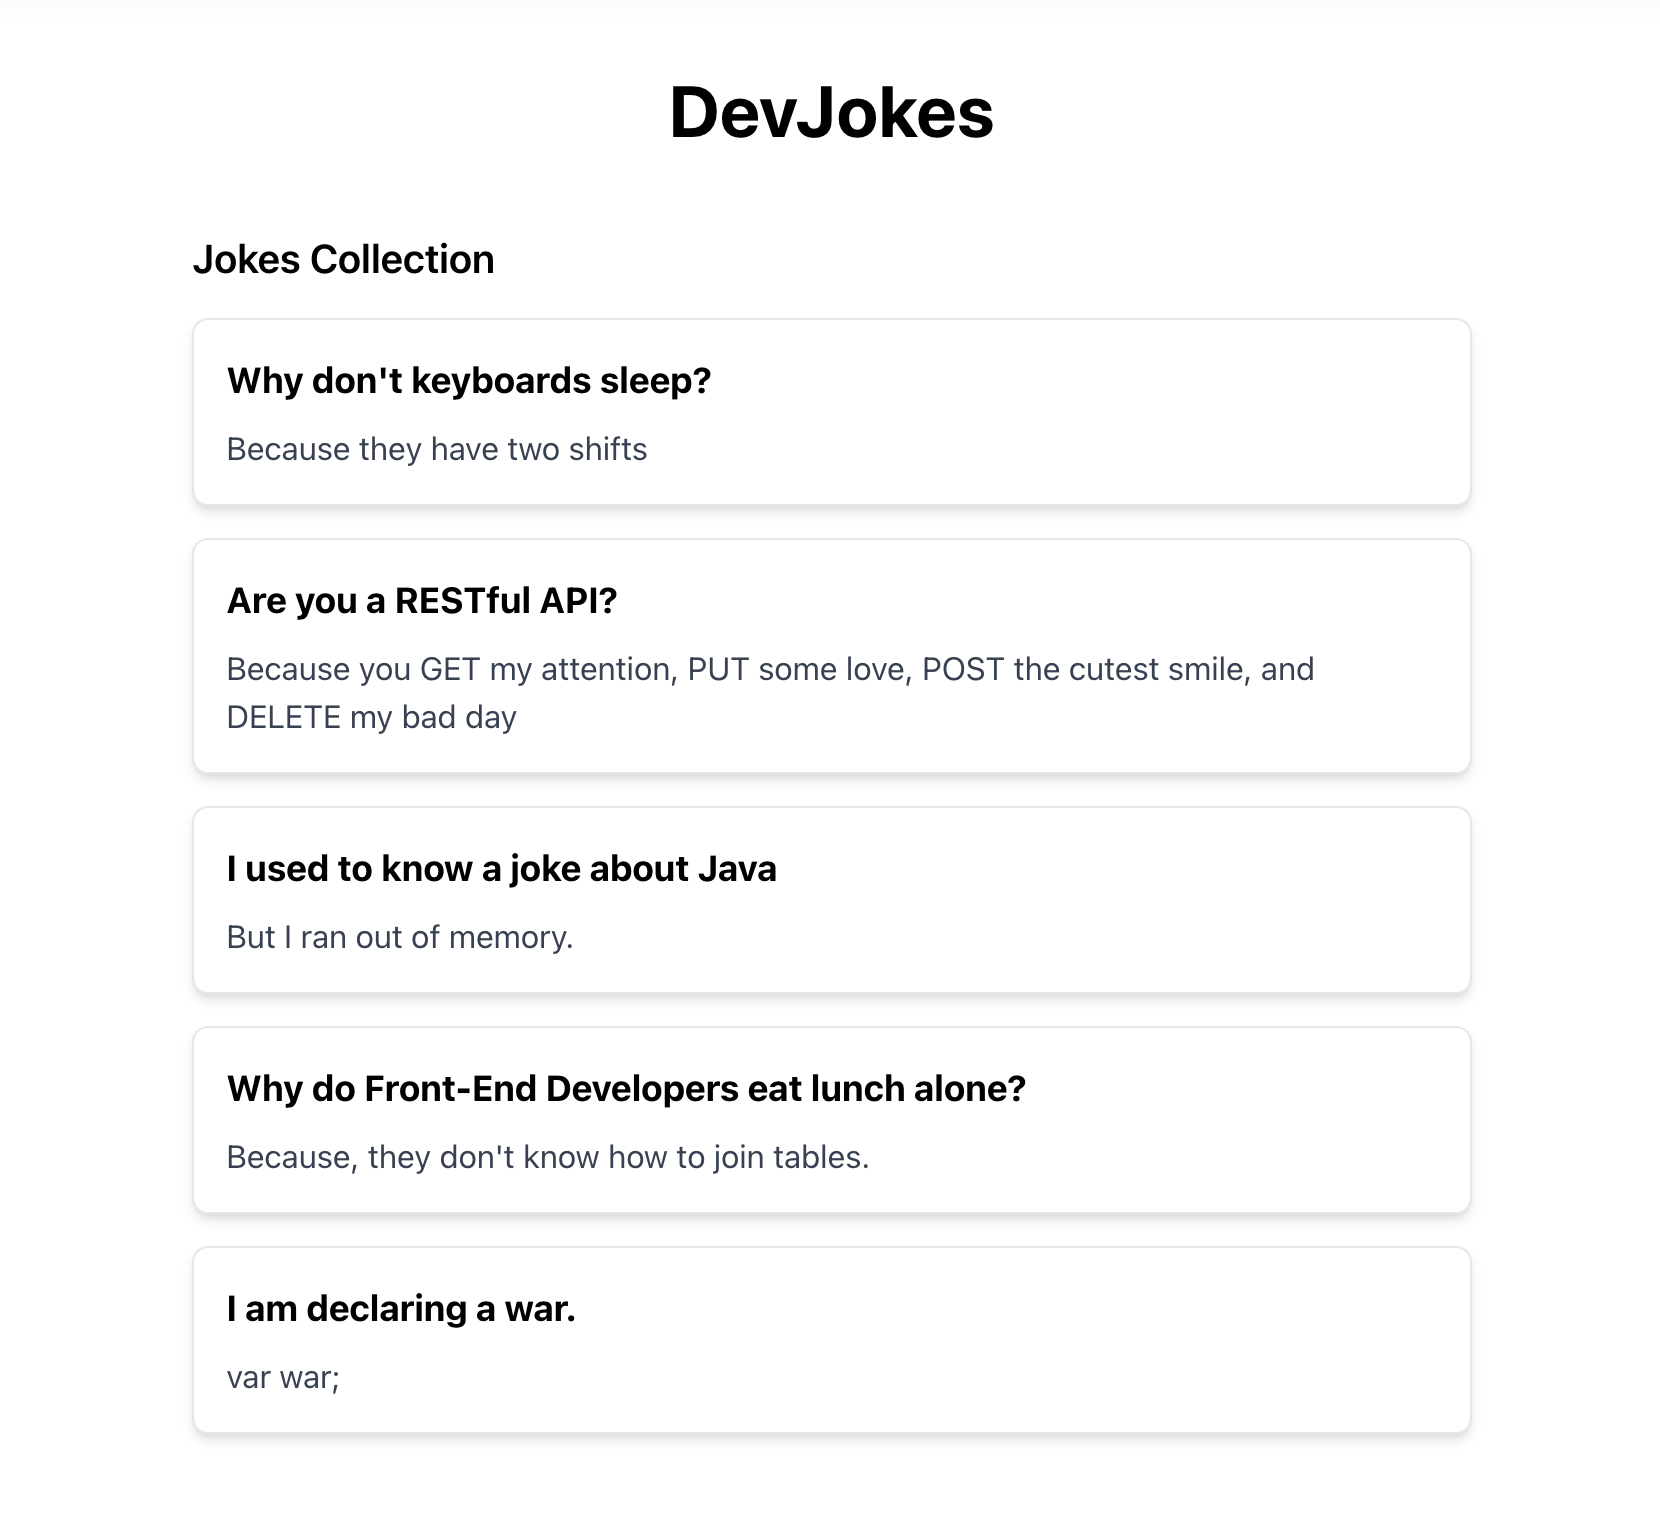
现在让我们创建一个新组件 JokesList,在页面上渲染段子,并点缀一点 Tailwind 样式。
// src/components/JokesList.tsx
import { Joke } from '../types'

interface JokesListProps {
  jokes: Joke[]
}

export function JokesList({ jokes }: JokesListProps) {
  if (!jokes || jokes.length === 0) {
    return <p className="text-gray-500 italic">No jokes found. Add some!</p>
  }

  return (
    <div className="space-y-4">
      <h2 className="text-xl font-semibold">Jokes Collection</h2>
      {jokes.map((joke) => (
        <div
          key={joke.id}
          className="bg-white p-4 rounded-lg shadow-md border border-gray-200"
        >
          <p className="font-bold text-lg mb-2">{joke.question}</p>
          <p className="text-gray-700">{joke.answer}</p>
        </div>
      ))}
    </div>
  )
}
现在让我们在 index.tsx 中调用我们的服务器函数——用随 TanStack Start 一起安装的 TanStack Router!
// src/routes/index.tsx
import { createFileRoute } from '@tanstack/react-router'
import { getJokes } from './serverActions/jokesActions'
import { JokesList } from './JokesList'

export const Route = createFileRoute('/')({
  loader: async () => {
    // Load jokes data when the route is accessed
    return getJokes()
  },
  component: App,
})

const App = () => {
  const jokes = Route.useLoaderData() || []

  return (
    <div className="max-w-2xl mx-auto py-12 px-4 space-y-6">
      <h1 className="text-4xl font-bold text-center mb-10">DevJokes</h1>
      <JokesList jokes={jokes} />
    </div>
  )
}页面加载时,jokes 就已经有来自 jokes.json 文件的数据了!
配上一点 Tailwind 样式,应用看起来会是这样:
第 2 步:向文件写入数据
到目前为止,我们已经成功地从文件读取了数据!我们可以用同样的方式,用 createServerFn 向 jokes.json 文件写入数据。
第 2.1 步:创建写入文件的服务器函数
是时候修改 jokes.json 文件,让我们能向它添加新段子了。让我们创建另一个服务器函数,但这次用 POST 方法来写入同一个文件。
// src/serverActions/jokesActions.ts
import { createServerFn } from '@tanstack/react-start'
import * as fs from 'node:fs'
import { v4 as uuidv4 } from 'uuid' // Add this import
import type { Joke, JokesData } from '../types'

const JOKES_FILE = 'src/data/jokes.json'

export const getJokes = createServerFn({ method: 'GET' }).handler(async () => {
  const jokes = await fs.promises.readFile(JOKES_FILE, 'utf-8')
  return JSON.parse(jokes) as JokesData
})

// Add this new server function
export const addJoke = createServerFn({ method: 'POST' })
  .validator((data: { question: string; answer: string }) => {
    // Validate input data
    if (!data.question || !data.question.trim()) {
      throw new Error('Joke question is required')
    }
    if (!data.answer || !data.answer.trim()) {
      throw new Error('Joke answer is required')
    }
    return data
  })
  .handler(async ({ data }) => {
    try {
      // Read the existing jokes from the file
      const jokesData = await getJokes()

      // Create a new joke with a unique ID
      const newJoke: Joke = {
        id: uuidv4(),
        question: data.question,
        answer: data.answer,
      }

      // Add the new joke to the list
      const updatedJokes = [...jokesData, newJoke]

      // Write the updated jokes back to the file
      await fs.promises.writeFile(
        JOKES_FILE,
        JSON.stringify(updatedJokes, null, 2),
        'utf-8',
      )

      return newJoke
    } catch (error) {
      console.error('Failed to add joke:', error)
      throw new Error('Failed to add joke')
    }
  })
在这段代码中:
- 我们用
createServerFn创建了在服务器上运行、但可以从客户端调用的服务器函数。这个服务器函数用于向文件写入数据。 - 我们首先用
validator校验输入数据。这是一个好习惯,能确保我们收到的数据格式正确。 - 我们在
handler函数中执行实际的写入操作。 getJokes从我们的 JSON 文件读取段子。addJoke校验输入数据并向我们的文件添加新段子。- 我们用
uuidv4()为段子生成唯一 ID。
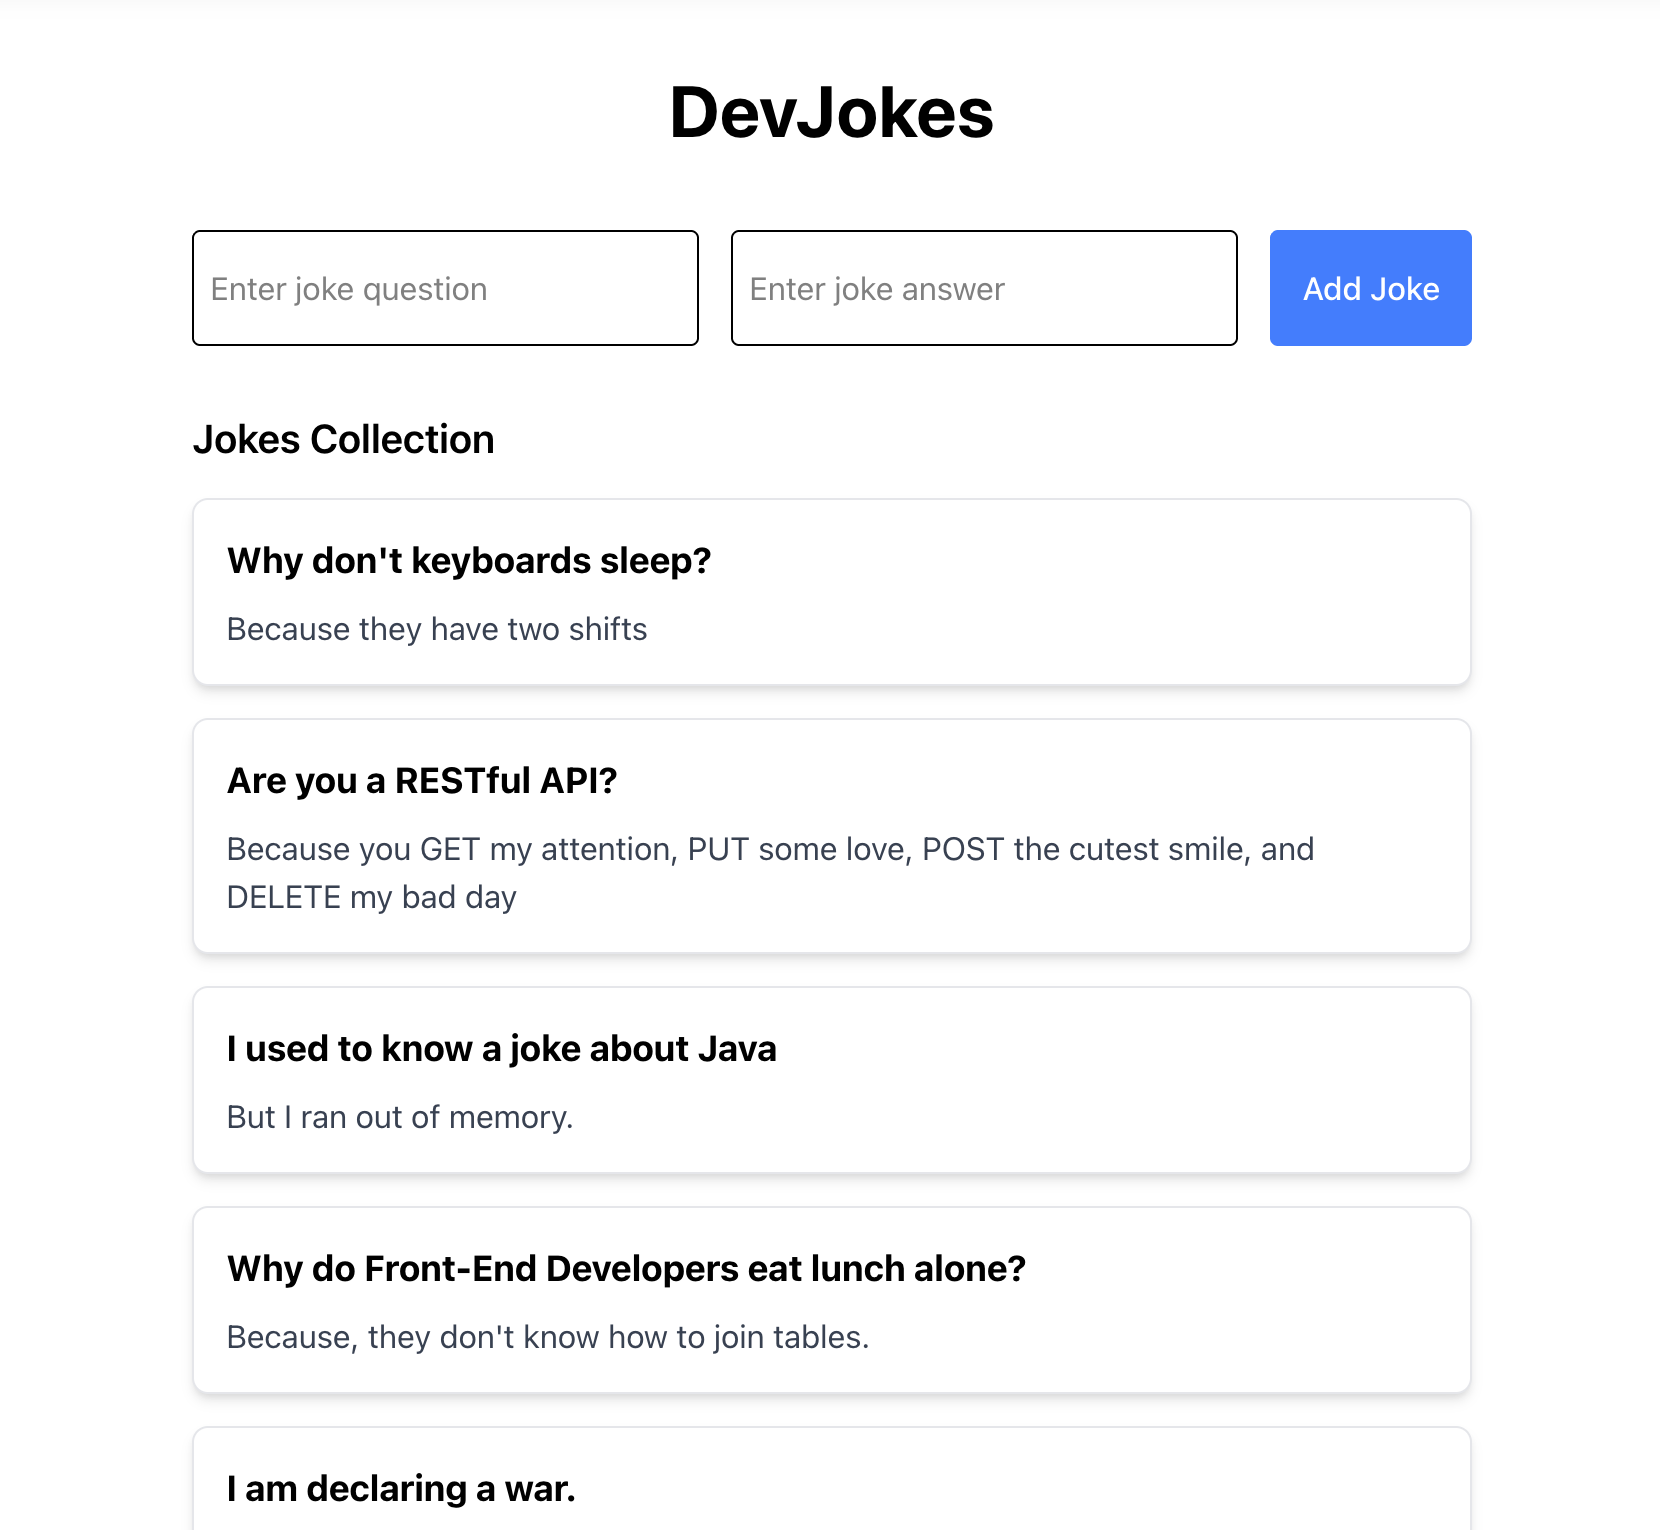
第 2.2 步:添加一个表单,向 JSON 文件添加段子
现在,让我们修改首页,让它展示段子并提供添加新段子的表单。让我们创建一个叫 JokeForm.jsx 的新组件,并向它添加下面的表单:
// src/components/JokeForm.tsx
import { useState } from 'react'
import { useRouter } from '@tanstack/react-router'
import { addJoke } from '../serverActions/jokesActions'

export function JokeForm() {
  const router = useRouter()
  const [question, setQuestion] = useState('')
  const [answer, setAnswer] = useState('')
  const [isSubmitting, setIsSubmitting] = useState(false)
  const [error, setError] = useState<string | null>(null)

  return (
    <form onSubmit={handleSubmit} className="mb-8">
      {error && (
        <div className="bg-red-100 text-red-700 p-2 rounded mb-4">{error}</div>
      )}

      <div className="flex flex-col sm:flex-row gap-4 mb-8">
        <input
          id="question"
          type="text"
          placeholder="Enter joke question"
          className="w-full p-2 border rounded focus:ring focus:ring-blue-300 flex-1"
          value={question}
          onChange={(e) => setQuestion(e.target.value)}
          required
        />

        <input
          id="answer"
          type="text"
          placeholder="Enter joke answer"
          className="w-full p-2 border rounded focus:ring focus:ring-blue-300 flex-1 py-4"
          value={answer}
          onChange={(e) => setAnswer(e.target.value)}
          required
        />

        <button
          type="submit"
          disabled={isSubmitting}
          className="bg-blue-500 hover:bg-blue-600 text-white font-medium rounded disabled:opacity-50 px-4"
        >
          {isSubmitting ? 'Adding...' : 'Add Joke'}
        </button>
      </div>
    </form>
  )
}
第 2.3 步:把表单接到服务器函数
现在,让我们在 handleSubmit 函数中把表单接到 addJoke 服务器函数。调用服务器函数很简单!它就是一个函数调用。
//JokeForm.tsx
import { useState } from 'react'
import { useRouter } from '@tanstack/react-router'
import { addJoke } from '../serverActions/jokesActions'

export function JokeForm() {
  const router = useRouter()
  const [question, setQuestion] = useState('')
  const [answer, setAnswer] = useState('')
  const [isSubmitting, setIsSubmitting] = useState(false)
  const [error, setError] = useState<string | null>(null)

  const handleSubmit = async () => {
    if (!question || !answer || isSubmitting) return
    try {
      setIsSubmitting(true)
      await addJoke({
        data: { question, answer },
      })

      // Clear form
      setQuestion('')
      setAnswer('')

      // Refresh data
      router.invalidate()
    } catch (error) {
      console.error('Failed to add joke:', error)
      setError('Failed to add joke')
    } finally {
      setIsSubmitting(false)
    }
  }

  return (
    <form onSubmit={handleSubmit} className="mb-8">
      {error && (
        <div className="bg-red-100 text-red-700 p-2 rounded mb-4">{error}</div>
      )}
      <div className="flex flex-col sm:flex-row gap-4 mb-8">
        <input
          id="question"
          type="text"
          placeholder="Enter joke question"
          className="w-full p-2 border rounded focus:ring focus:ring-blue-300 flex-1"
          value={question}
          onChange={(e) => setQuestion(e.target.value)}
          required
        />
        <input
          id="answer"
          type="text"
          placeholder="Enter joke answer"
          className="w-full p-2 border rounded focus:ring focus:ring-blue-300 flex-1 py-4"
          value={answer}
          onChange={(e) => setAnswer(e.target.value)}
          required
        />
        <button
          type="submit"
          disabled={isSubmitting}
          className="bg-blue-500 hover:bg-blue-600 text-white font-medium rounded disabled:opacity-50 px-4"
        >
          {isSubmitting ? 'Adding...' : 'Add Joke'}
        </button>
      </div>
    </form>
  )
}
译者注:router.invalidate() 是干什么的?
router.invalidate() 会让当前路由重新执行 loader 拉取最新数据,页面上的数据自然就跟着刷新了——所以我们添加新段子后要调用它。
这样一来,我们的 UI 看起来会是这样:
理解各部分如何协同工作
下面拆解一下应用的各部分是怎么协同工作的:
-
服务器函数:在服务器上运行,处理数据操作
getJokes:从我们的 JSON 文件读取段子addJoke:向我们的 JSON 文件添加新段子
-
TanStack Router:处理路由和数据加载
loader函数在路由被访问时获取段子数据useLoaderData让这些数据在我们的组件中可用- 添加新段子后,
router.invalidate()刷新数据
-
React 组件:构建应用的 UI
JokesList:展示段子列表JokeForm:提供添加新段子的表单
-
基于文件的存储:把段子存储在 JSON 文件中
- 读写由 Node.js 的
fs模块处理 - 数据在服务器重启后依然持久化
- 读写由 Node.js 的
数据如何流经应用
数据流
sequenceDiagram
autonumber
actor User
participant UI as Browser (HomePage + Form)
participant Loader as Route Loader (loader)
participant Server
participant Store as jokes.json

%% Visiting the Home Page
User ->> UI: Visit /
UI ->> Loader: loader() calls getJokes()
Loader ->> Server: getJokes()
Server ->> Store: Read jokes.json
Store -->> Server: jokes data
Server -->> Loader: jokes[]
Loader -->> UI: useLoaderData() → jokes[]

%% Adding a New Joke
User ->> UI: Fill form and submit
UI ->> Server: handleSubmit → addJoke(newJoke)
Server ->> Store: Read jokes.json
Server ->> Store: Write updated jokes.json
Server -->> UI: addJoke() resolved
UI ->> Loader: router.invalidate() (re-run loader)
Loader ->> Server: getJokes()
Server ->> Store: Read jokes.json
Store -->> Server: updated jokes[]
Server -->> Loader: updated jokes[]
Loader -->> UI: useLoaderData() → updated jokes[]
当用户访问首页时:
- 路由的
loader函数调用getJokes()服务器函数 - 服务器读取
jokes.json并返回段子数据 - 数据通过
useLoaderData()传给HomePage组件 HomePage组件把数据传给JokesList组件
当用户添加新段子时:
- 他们填写表单并提交
handleSubmit函数调用addJoke()服务器函数- 服务器读取当前段子,添加新段子,并把更新后的数据写回
jokes.json - 操作完成后,我们调用
router.invalidate()刷新数据 - 这会再次触发 loader,获取更新后的段子
- UI 更新,在列表中显示新段子
下面是应用运行效果演示:
常见问题与调试
下面是构建 TanStack Start 应用时可能遇到的一些常见问题及其解决方法:
服务器函数不工作
如果你的服务器函数不符合预期:
- 检查你是否使用了正确的 HTTP 方法(
GET、POST等) - 确保文件路径正确且服务器可访问
- 查看服务器控制台中的错误信息
- 确保你没有在服务器函数中使用仅客户端的 API
路由数据不加载
如果路由数据加载不正常:
- 验证你的 loader 函数实现是否正确
- 检查你是否正确使用了
useLoaderData() - 在浏览器控制台查找错误
- 确保你的服务器函数工作正常
表单提交问题
如果表单提交不工作:
- 检查服务器函数中是否有校验错误
- 验证表单事件阻止(
e.preventDefault())是否生效 - 确保状态更新正确发生
- 在浏览器的开发者工具中查找网络错误
文件读写问题
使用基于文件的存储时:
- 确保文件路径正确
- 检查文件权限
- 确保你正确用
await处理异步操作 - 为文件操作添加适当的错误处理
总结
恭喜!你已经用 TanStack Start 构建了一个全栈 DevJokes 应用。在这个教程中,你学到了:
- 如何搭建一个 TanStack Start 项目
- 如何实现用于数据操作的服务器函数
- 如何读写文件数据
- 如何为 UI 构建 React 组件
- 如何使用 TanStack Router 做路由和数据获取
这个简单的应用展示了 TanStack Start 用极少量代码构建全栈应用的能力。你可以通过添加这些特性来扩展这个应用:
- 段子分类
- 编辑和删除段子的能力
- 用户认证
- 给喜欢的段子投票
本教程的完整代码见 GitHub。